iOS Camera Backup to Server using Shortcuts
Backing up my photos and videos from iOS has always been painful. In the early days, it was plug a cable into my iPhone, open Image Capture, download everything and then save it all to a hard drive somewhere.
I don't pay for additional iCloud storage but I do have a home server to backup things like this which can be useful. As a result, in recent years, I've used a combination of things like NextCloud and Resilio Sync with mixed results. NextCloud was way too heavy for my use-case and although Resilio was good, the limitations that iOS puts on background processes means that I had to keep opening up the app in order for things to upload to my local server.
It's worth saying that I do also use Google Photos but I don't rely on it as a backup solution.
Shortcuts
Shortcuts is something I've seen with recent iOS (and macOS) releases and it's something that I've always been interested in leveraging, especially given it's automation capabilites. I just never had an idea for what I could need it for...until now.
I'm not sure why it didn't occur to me sooner but I realised that Shortcuts is fully capable of executing scripts and running activities on a schedule which is the exact thing I was after for backing up things from my Camera Roll.
Prerequisites
- A running server with SSH
- An iOS device with the Shortcuts app installed
Setup Shortcut
- On your iOS device, open Settings > Shortcuts > Advanced and enable the following:
- Allow Running Scripts
- Allow Sharing Large Amounts of Data
- Open up Shortcuts.
- Ensure My Shortcuts is selected from the bottom navigation tab bar and click the
+in the top right corner to create a new one. - Give it a name like Camera Backup.
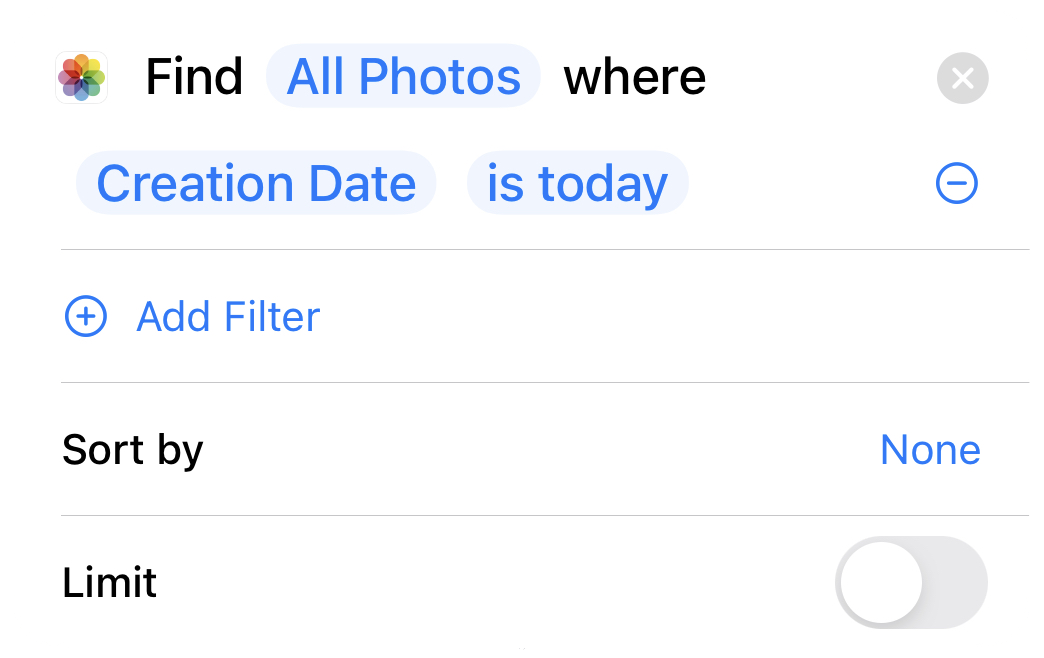
- Click Add action and search for Find Photos.
- Now select All Photos > where Creation Date is today without any filters or limits. This will also include videos.
- Now add a new action and search for Count. We want to store the amount of items it has found as we're going to use this in a notification later. Use the
Itemsvariable type here.

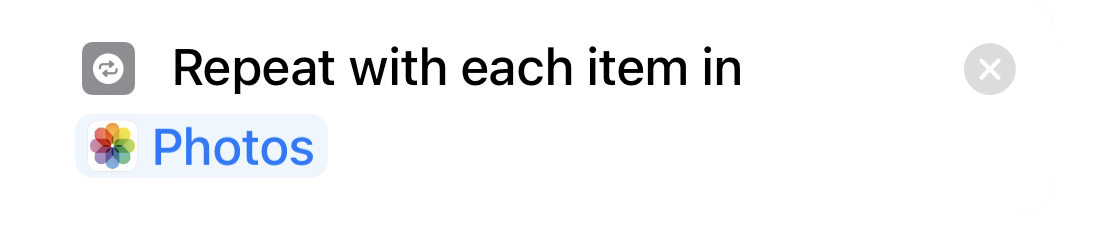
- Now, we want to add a new action. This time search for Repeat with each. This will run against each item kind of like a
forloop.
- Within the each, add a new action and search for Run script over SSH and enter the following. (I'll leave the host, port and authentication methods to you).
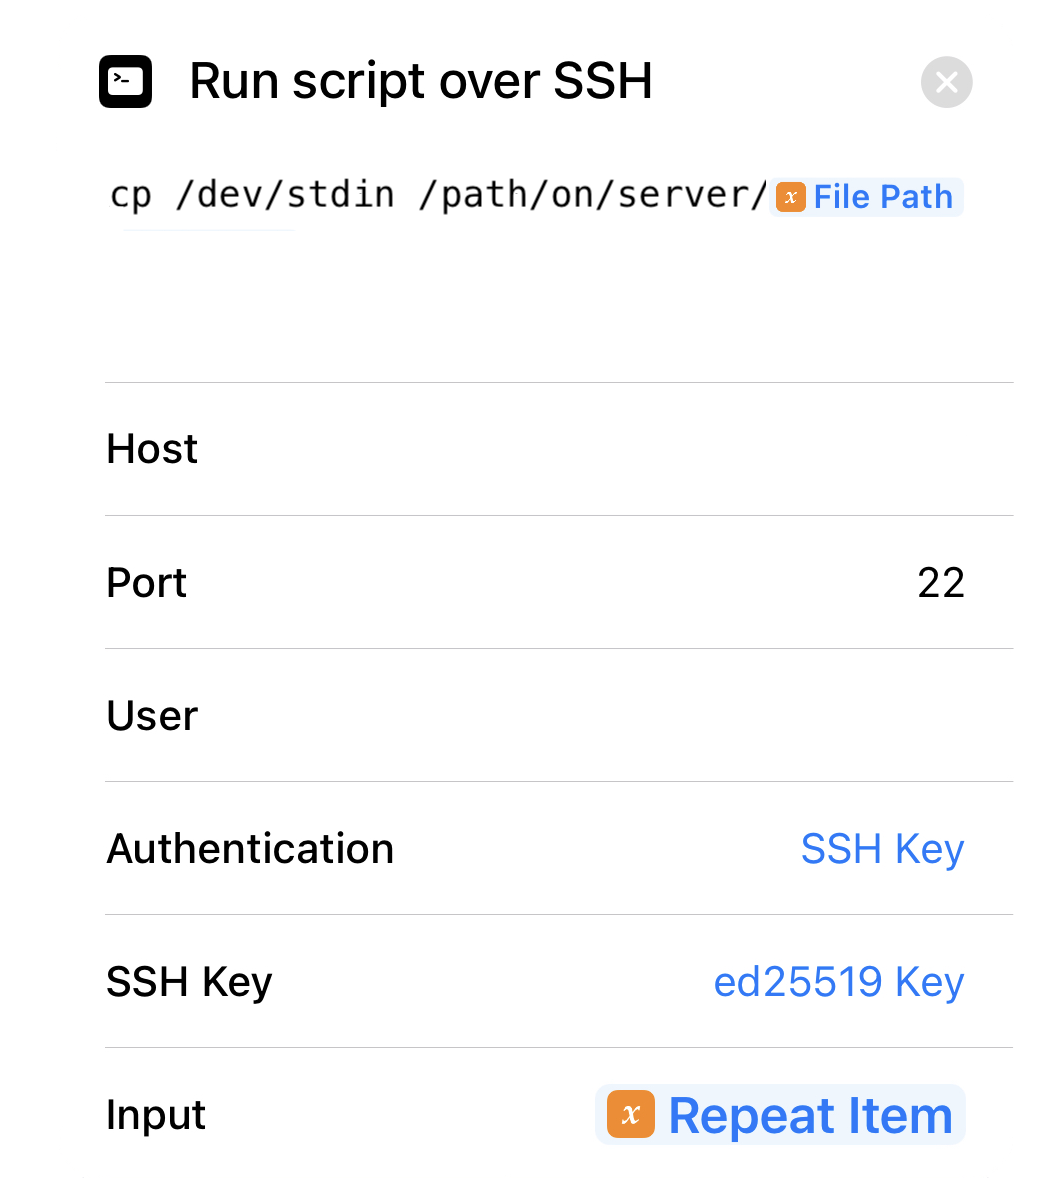
To explain, /dev/stdin is the input received from each iteration. We then run a cp or scp command which copies the current item to a path on your server. The File Path variable is then used which will include the name of the file including its extension.
Tip
Regarding connection details to your server, I'd recommend using an SSH key.
You can generate one using the Shortcuts app. You can then add this manually
to the ~/.ssh/authorized_keys file on the target
server.
Alternatively, you can just use username and password.
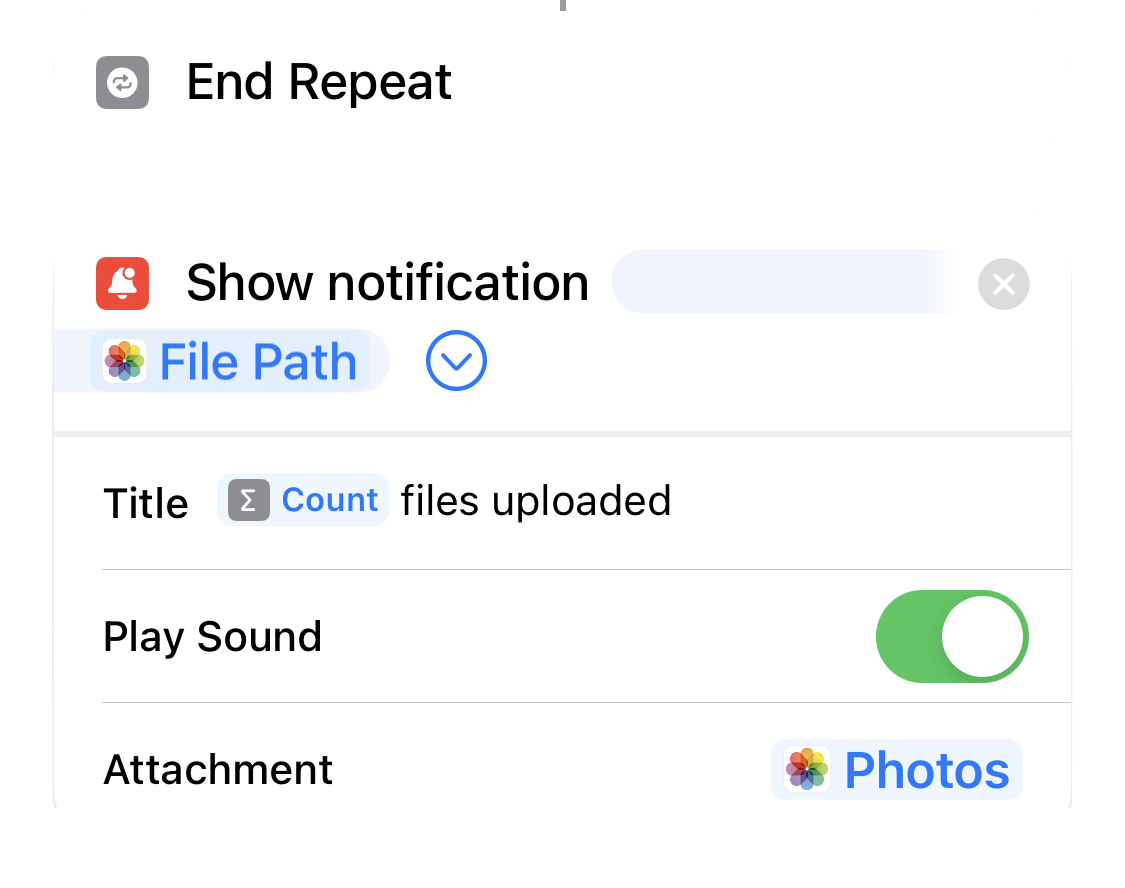
- Finally we want to send a notification once this Shortcut has been triggered. To do that, add a new action and search for Show notification and as you can see from the screenshot below, we're going to use the
Countvariable we created earlier.
All files that have been uploaded will be listed in the notification.
Automation
- Click the
Xicon in the top-right corner of your newly created Shortcut and navigate using the tab bar at the bottom to Automation. - Tap Create Personal Automation.
- For scheduled triggers, select Time of Day and select a preferrable time and hit Next.
- Tap Add Action and search for Run Shortcut.
- Now click Shortcut and select your newly created shortcut.
- Hit Next and deselect Ask Before Runnning.
- Hit Done.
Warning
The first time this automation runs, you will be prompted for certain permissions. It's important that these are all set to Allow Always.
To do this, I'd recommend setting the automation schedule to sometime close to the future so you can witness it run for the first time and grant the Shortcut the permissions it needs.
Also note that it is possible to create the actions we created in the Shortcut directly inside a new Automation. However, you can't share automations. By creating it as a Shortcut first and then pointing your Automation to run that Shortcut allows you to share the Shortcut independent of the Automation.